Pinterest

Saturday 22 December 2012

Twas the night before Christmas..... well, nearly

Hello to all my Followers and Blog Friends

This is my last post before I take a little blog break to spend time with family and friends.  I will try to catch up on any posts over the Christmas period.

I cannot think of any words that are sufficient to say how much I value your friendship and support.  I started my little blog earlier this year after a very long spell of illness and it has been a life saver for me.  You have all made it so worthwhile and I thank you from the bottom of my heart.  You have encouraged me, supported me,  made me smile, made me laugh and sometimes cry..... but never in a bad way.  I look forward to better things for all of us next year and I wish you and your families the happiest of Christmases and a very healthy, happy and prosperous New Year.  Thank you all!

So why the title  'Twas the night before Christmas'?  Well, a couple of weeks ago I wanted to enter a challenge at Simon Says where we had to create something, inspired by any of Tim's 12 Tags.

I wanted to re-create Day 10 of 2009, where Tim used sticky backed metal sheets and alcohol inks.  I tried and tried to get it right and after three attempts I managed a version of it but I missed the deadline for the challenge.  In any case I was still not happy with the result - I do have a love/hate relationship with alcohol inks, but was determined to finish it and here it is:


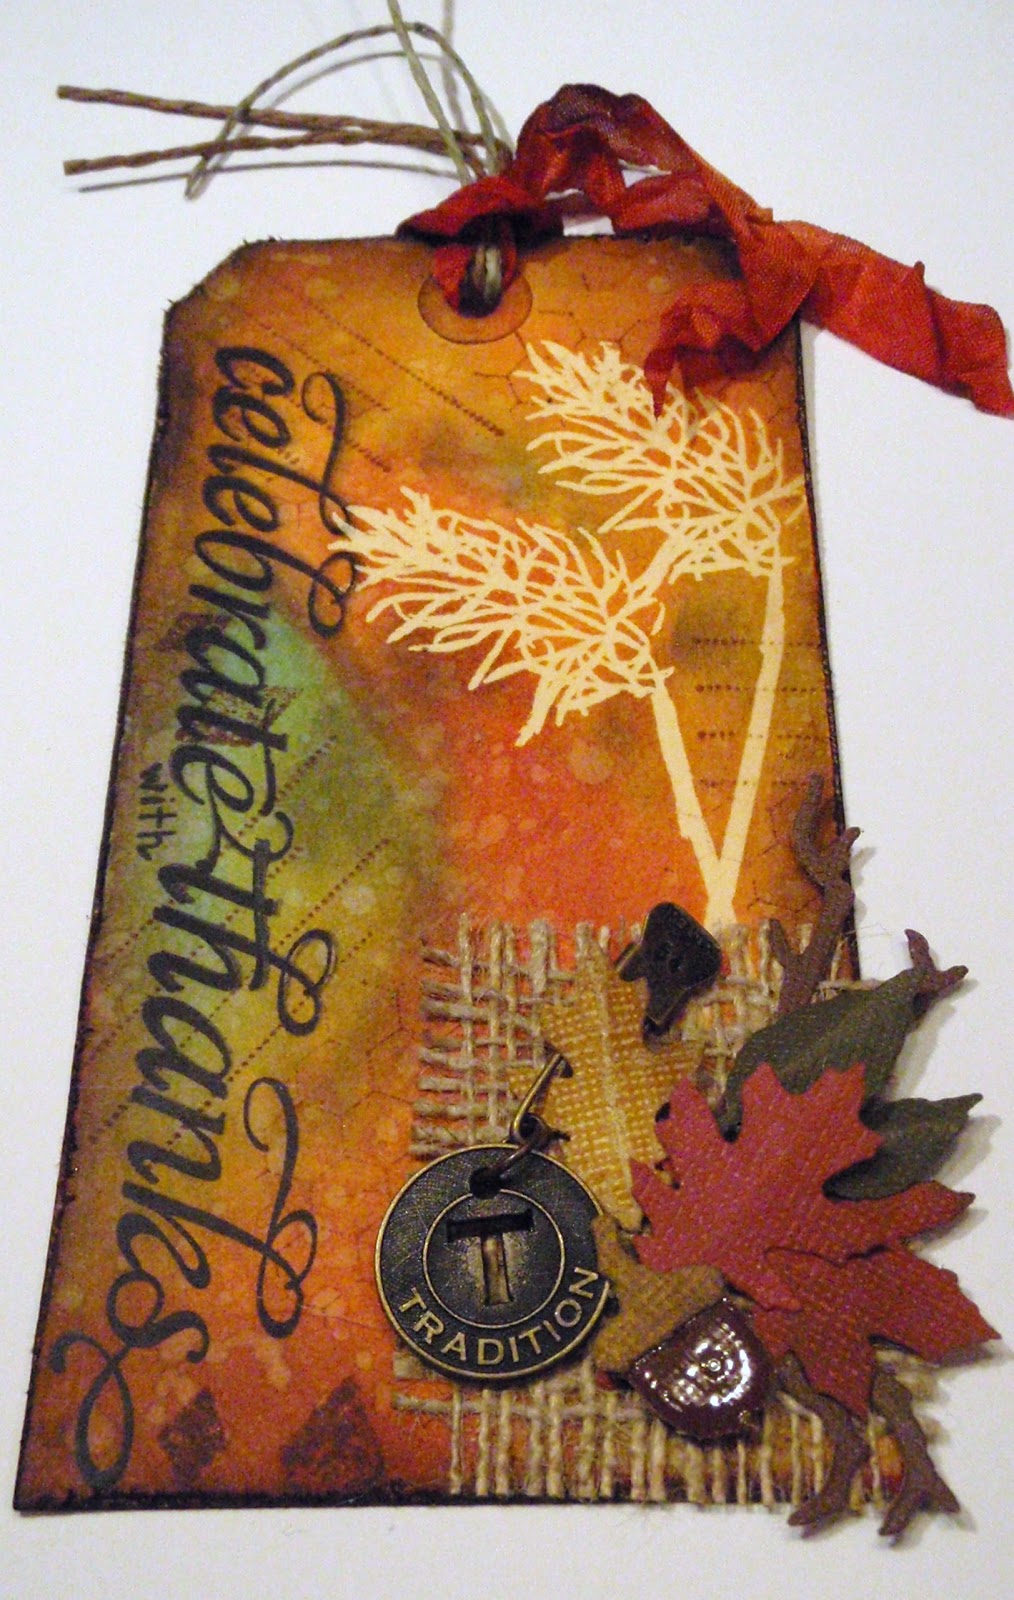
Twas the night before Christmas is one of my favourite poems - the word Christmas is on the little tag dangling from the tag.  I used the same techniques as Tim did and I added a metal heart, coloured with alcohol ink (that went surprisingly well!), added some staples as Tim did and a ribbon dyed with Festive Berries DI.  The pearls are TH Idea-ology. 
 
If you click on the picture you will see the embossing a little more clearly. 
 
Edited to add: I used the WordPlay die to cut the letters, they are arranged on the tag, the metal is laid on top.  The next step is to gently go over and around the letters with an embossing tool.  I then coloured the embossed tag with the alcohol inks and then gently sanded off the colour from the words so that the metal shows through.
 
I don't make New Year resolutions, as a rule, but this year I am going to try harder with all the craft products that I struggle with - including alcohol inks. Now there's a challenge!
 
Bye for now and hope to see you all soon.  Again, hope you have a wonderful Christmas!  Thank you again.  Big hugs, Anne x


Thursday 20 December 2012

Christmas Wrapping

Hello Everyone

Just a quick post (as I know you will all likely be tied up with Christmas preparations) to show you some gift bags that I made to wrap some special presents.  They are large enough to take a very large bar of chocolate or a nice piece of jewellery.

I am entering these into Simon Says Stamp and Show where the challenge is Gift-spiration and I thought my gift bags would be appropriate to enter.  The Design Team have made the most beautiful items, it is worth popping over just to have a look at them.  There is a $50 Gift Voucher on offer to spend at Simon Says Stamp, and the winner of the voucher will be picked by Random Generator.  Three other people will be chosen as the Top Three by the Design Team.


The bags are made from a template that I created from a chocolate bag wrapper that I took apart.  It goes together easily and if it is made from lightweight card it is quite substantial.

The first one is made up in plain white card and I added some gorgeous BoBunny papers, added a Spellbinders poinsettia, a bow dyed with Festive Berries Distress Ink, and a  snowflake charm.  The flap at the top is the reverse side of the BoBunny paper and the peg holding the bag closed is covered in the same paper.

The second bag is made from my gorgeous Teresa Collins cardstock, the flap at the top is the reverse side of the cardstock.  I punched two holes and threaded through ribbon from my stash.  The pinecones and the 25 are from Tim Holtz dies.  The 25 has been covered in Rock Candy Distress Glitter to give a subtle sparkle.

If you do visit I hope you will leave me a comment, I love to read them all and I will always do my best to return the compliment.  Hugs, Anne x


Wednesday 19 December 2012

WOYWW - Week 185

Hello Everyone

Another week has flown by.   Hope you are all ready for the festivities ahead and looking forward to a wonderful break.

It is that time of week when we share our desks with a whole world of crafters, courtesy of our wonderful Hostess Julia, who can be found HERE.  If you want to join in then please visit Julia who will give you full details.

Not a great deal on my desk this week as I am out all day today visiting and looking after Grandchildren (but I will catch up with WOYWWers over the next day or so), just some more knitting.  Another fingerless glove waiting to be sown up and for  me to knit a mate.


Also on my desk, from left to right is a box that I have altered with crackle paint, a gift bag that I made which is ready to be filled for Christmas, a new stamp which was a swap gift by fellow WOYWWer Sandy and then just my usual crafty stuff.

I would like to show some of the cards that I have received, in the main from lovely crafters I have had the pleasure to meet through WOYWW. 


I am not naming the senders (and yes I have duplicated one) but aren't they all beautiful?  Apologies for the arrangement but I cannot get used to using this laptop, the photo system is different to my PC, which did come back, allegedly repaired but was not and it has had to go back to the PC hospital and I am unlikely to get it back before the new year!

My heartfelt sympathies to all those affected by the recent tragic events in Newtown, USA.

That's it from me this week.  If you do visit I hope you will leave me a message, I always do my best to return the compliment.  Hope you have a wonderful Christmas.   Hugs, Anne xx


Sunday 16 December 2012

A Holly Tree

Hello Fellow Bloggers and Friends

I have gone back to my roots with my offering today, I only ever made 'pretty' cards until I started blogging and got hooked on Tim Holtz and Wendy Vecchi products, used by so many of my blogging friends and those who inspire me so much.

Hels Sheridan's Sunday Stampers this week (Week 236) is based on that wonderful song, The Holly and the Ivy and we are to create something with holly on it. 

Because I also used lots of glitter card and other sparkles I thought it would be appropriate to enter the Penny Black December Challenge where the challenge is to create something with Glitter and Sparkle.  There are four sponsors offering great prizes for this challenge.

Here is my offering:


The holly tree and sentiment are both Penny Black stamps.  The backing paper (green) is from a paper pad called Authentique and this has been matted onto glitter card..  The red dotty backing is from my stash and this has been matted onto an 8" x 8" square card.

The holly tree has been coloured with TH Distess Inks and the berries have been coated with Glossy Accents with glitter sprinkled over.  I went around the edges of the of the tree and sentiment mats with Festive Berries Distress Ink and mounted these onto glitter card.  The ribbon has been coloured using Festive Berries DI together with Glimmer Mist in Abominable Snowman (my favourite colour).  It is very sparkly in real life.  I made a double bow and attached three shiny jingle bells.

I am not sure the glitter and sparkle show up but I am happy with the result.  It was nice to do a card like this for a change, it is for a friend who does not really appreciate grunge or vintage.

If you do visit, I hope you will be kind enough to leave me a comment, I love to read them all.  I would like to say thank you to all of you who have commented in the last week or so when you have been so busy with your Christmas preparations, it is much appreciated.  Big hugs, Anne xx

Thursday 13 December 2012

Tim's Tags December 2012

Hello Everyone

This is quite sad as this is the last month for Tim Holtz's 12 Tags for 2012 but the good news is that we get to make an extra tag for the month of January 2012!  So two tags.  You can see Tim's original tags HERE.  I have followed Tim's tags fairly rigidly, where I had the products to do so and this month I was only short a few so was a very happy bunny.

These are my tags:


On the first tag I used all the techniques that Tim used but I did not have the Idea-ology snowflake so I used a metal one from my stash.  The tinsel at the bottom is Tim's blue one as I used all the silver tinsel on my Christmas cards.  I do not yet have the mirrored card that is in Tim's range and so I did my JOY using some holographic mirror card which has a lovely sheen to it.


For the second tag, again I used the same techniques and colours that Tim did but I did not have the Joy to the World die and used a stamp from my stash on the ticket.  I stamped it with Versamark and then embossed it with JudiKins Black Detail Embossing Powder. 


Again I did not have the Idea-ology deer charm.  I was stumped on this for a while and then had a brainwave.  I took the Movers and Shapers small deer die and cut this out in Shrink Plastic but when I shrunk it down it was far too tiny.  I cut the deer out again on card and then triple embossed it with Debbi Moore's Metal Magic in silver to create a faux silver deer.  I then embossed the shrink plastic deer in the same way.  I was really pleased with the result.  I liked the little one so I put it together with the big one to look like Mum and Baby.

I do hope Tim keeps to this format with his tags for 2013, it is so much easier doing one per month than one each for the 12 days of Christmas and it lets us focus on other occasions throughout the year.

If you do visit I hope you will leave me a comment, I love to read them and providing I can find you I will always return the compliment.   Hope you are all nearly ready for the festivities ahead.  Hugs, Anne xx

Wednesday 12 December 2012

WOYWW - Week 184

Hello WOYWWers and Fellow Bloggers

Julia will be pleased with me because I am keeping short and sweet!  Julia is our wonderful hostess at What's On Your Workdesk Wednesday and if you want to join in then pop over and let Julia tell you how to do it.

I have not done any crafting for the last two days because I have been busy wrapping all the Christmas presents - how did I come to buy so much?  This is a very small selection which I am packing up into various bags and boxes........


Have also tried my hand at knitting some fingerless mits, with one of the dozens of unused balls of yarn/wool that I have.  Not sure I like this design but it took me ages so I am going to knit a mate for it.


I got happy mail this last week too, which cheered me up no end -  from some wonderful WOYWWers, Eels, Sandee and also May, thank you ladies for your brilliant cards/tags, I will photograph them and put them on my blog soon. 

Hope you are getting on well with your Christmas preparations, we always put our tree up late so that is next on the list as well as doing Tim's tags for December.  I have an appointment this morning but I will try to visit as many of you as possible.  Happy WOYWW,  Hugs, Anne x

Monday 10 December 2012

NOEL

Hello Blog Friends

Well, my poor old PC is still at the Computer Hospital but I have persevered with DH's laptop, I have figured out how to load photos and so this is an experiment to see if I can upload the photos to my blog! 

I would like to say thank you first to all my lovely Followers, old and new, for your continued support.  I get so excited every time I see a comment, I love reading them and they give me so much encouragement, so thank you all!

I have done a piece for two challenges.  I was so inspired by my very talented blog friend Butterfly who used Tim Holtz's wings die, that I just had to have a go myself.  This is such a beautiful die which I originally purchased to use as butterfly wings. 

At Sunday Stampers this week (week 235), which is hosted by the amazing Hels Sheridan, the challenge is to create something based on the theme of NOEL (The First Noel).

Also, the challenge this week at Anything But a Card is Celebrating the light or Seasonal Holiday and I have chosen to follow the Seasonal Holiday approach with my Christmas Decoration.

 My make is a bit different and kind of evolved, there are so many fabulous Christmas decorations out there in blogland and I wanted to do something a bit different but also needed to try and meet the requirement of the challenges.


I used a block of wood which is cut from a 2" x 4" plank of wood and is cut to approximately ATC size.  I painted the block with silver acrylic paint and then used my new Snazzy's win paper (Teresa Collins) to cover it on all sides including the top and bottom.  The papers were edged with Peacock Feathers distress ink.

I cut the wings using my Tim Holtz Bigz die - Layered Angel Wings.  I cut two sets for each side so they could go back to back.  I wanted to be able to turn the block around to view the back too.  I edged the wings again with Peacock Feathers DI.  The wings are fixed to the block with Glossy Accents (brilliant stuff because it dries in seconds).  The frame is a Tim Holtz Idea-ology one which I have coloured using the Ranger Alcohol Ink in Silver Mixative.  The word Noel is a Inkadinkado stamp and I stamped this in Peacock Feather DI, adhered it to the frame and then filled the frame with Glossy Accents.

I also coloured the brads in Silver Mixative and also the metal on the TH door knob (for the top) which was originally a brass colour.  I think the silver gives a lovely cool feeling to the piece.  The feet are wooden beads which I also coloured with silver acrylic paint.

The back looks like this:


The gorgeous snowflake is again a Tim Holz die, which sadly I do not own, but another wonderful blog friend Barb Cady gifted these to me when I mentioned how much I loved hers (Crafters really are the most generous people - thank you again Barb!).  I layered the smaller one on top of the larger one, glittered both and added a lovely blue gem to the centre.

I do hope you like my creation and that you will leave me a comment.  I do appreciate the time you take to leave comments, I love reading them and will always try to return the compliment (providing I can find you).  Crafty hugs, Anne xx

Saturday 8 December 2012

Tags - Sunday Stampers Week 234

Hello Friends and Fellow Bloggers

I am in a bit of a panic at the moment, my cherished PC has all but died and they are coming to take it away for repair so I am scheduling this post this in haste!

This week over at Sunday Stampers our Hostess Hels has chosen - Labelled with Love as her theme and we need to make a tag.  I have done mine in a bit of a rush due to said PC being poorly and here it is:


I used Tim Holtz products to create the foreground (die cuts) and Distress Inks and Metallic Pewter Distress Stain on the background.   I added some glitter card for snow at the bottom, a little piece of ribbon on the reindeer (his antlers are cut from the Movers and Shapers twig die).  The wording is a bargain stamp from Hobby Craft (£1) which I have embossed with silver embossing powder. 

The tree has been glittered with Stickles Rock Candy to give the appearance of snow.

I will still be able to comment on blogs, using OH's laptop but I am not great on that with my dodgy wrists (I do love my keyboard!).   Hope you will leave me a comment if you visit.  Hugs, Anne x

Thursday 6 December 2012

Simon Says Stamp and Show - house rules

Hello Friends and Fellow Bloggers

Well it is a while since I entered a challenge where there is a prize on offer but when I saw the challenge over at Simon Says Stamp and Show and saw all the inspiration from the design team I thought I would have a go.  The challenge this week is - house rules.  The prize offered by Simon Says Stamp is an amazing $50 - who wouldn't love to have that just before Christmas!

I have had a wooden birdhouse for about a year now, just waiting to be altered but I have never had the inspiration to get me going on it before now.  So, here is my entry:


As I said in my last post, I was so lucky to win the monthly kit over at Snazzys.  The kit contains Teresa Collins beautiful Christmas papers, stamps and embellishments.  Since I have made all my Christmas cards for this year I wanted to use the papers to make something special to keep.

The base is a wooden bird house from the Craft Barn.  I covered it with Gesso and then painted the bottom section and the little step with white acrylic paint.  The walls are covered in the gorgeous TC papers.  For the roof I wanted a corrugated look and I used my ribbler to 'corrugate' some silver mirror card.  I used the roof as a template and cut pieces for each of the four sides and glued them down.  I added some glue and some Polar White Flower Soft to give a snow like effect.  Here is a close up to give you a better view of the roof and snow.


I also added some Flower Soft to the base and to the little step.  The tree and the wreath are from Tim Holtz's Idea-ology Woodlands set.   I put some Silver Metallic alcohol ink into a plastic bag, put the tree and wreath in and shook it to coat them in the silver and once dried I glued on red gems and white pearls and added a red bow to the wreath.  Around the edge of the roof I added some of Tim's tinsel in red to give the whole piece a more festive feel.  The little knob at the top of the house was painted with silver acrylic paint.

I also covered a little bird with the TC paper and inked the edges with distress ink and added wire legs.  Putting the bird on the little step was just a bit too much, but I didn't want to leave him out  - so he is sitting at the side of his house, just for show!

Finally, I added the number 25 brad which is also from the TC kit.

If you do visit I hope you will leave me a comment, I do love to read them all and I thank you in advance if you do leave one.  I always do my best to return the compliment.  Hugs, Anne xx


Wednesday 5 December 2012

WOYWW - Week 183 (I think)

Hello fellow Woywwers and Bloggers

It has been a while.  I have certainly missed joining in.  Firstly I would like to thank my latest followers, it is lovely to have you along on my journey of learning and developing.  Thank you also to all of those who contacted me to enquire after me, I am much better now and hopefully will remain that way.

If you are wondering what on earth WOYWW is all about then please pop over to see our wonderful Hostess, Julia at http://stamping-ground.blogspot.co.uk and join in the fun!

My desk this week is a sad affair but I did have a huge win over at Snazzys where I won November's design kit and it comprises the most wonderful Teresa Collins paper pack, stamps and embellishments.  You can see them on the left hand side of my desk, they are gorgeous.  I have had to hide what I am making with them because it is not finished yet. 


In the middle of my desk is another brown paper bag album (similar to the Nutcracker one a few posts ago).  This is a commission for a little girl who does ballet and she is being taken to see the Nutcracker ballet as a Christmas gift.  Her sister is having the earlier Nutcracker album.  They are being given the albums with the ballet tickets inside - how sweet.

Here is a closer look at some of the inside:


On the right is some knitting, also for a Christmas present.

Well that's all from me, I am still making Christmas cards.  I have posted my international ones and nearly had to take out a mortgage to pay for them.  The cost of postage here in the UK has become ridiculous and I am not a happy bunny, but family and friends are important so I gritted my teeth and paid up!

Hope you are all well and I look forward to visiting as many of you as possible.  If you do visit I hope you will leave a comment, I always do my best to return the compliment.  Happy WOYWW!  Hugs, Anne x

Monday 26 November 2012

Sunday Stampers Week 233 - All Those Years Ago

Hello Everyone

A special welcome to my latest followers, I love the fact that you are interested in my little blog and thank you to all of you who visit regularly or when you can, I really do appreciate your support.

This week our Hostess, Hels Sheridan over at http://pinkleart.blogspot.co.uk has set our Sunday Stampers Challenge as 'All Those Years Ago' - and we are to create something Vintage.  Yikes, I don't really know much about vintage and never seem to be able to create anything that looks old or vintagey. 

But, it has been a week since I did anything crafty (terrible I know and I have no real excuse other than tiredness) so I thought I would have a go.  I still had lots of Christmas things on my desk so I set about creating this:


I used my faithful Tim Holtz Christmas Blueprint stamp of the toy soldier in the main image, coloured with Distress Inks, the edges of the piece were grunged up and inked with Vintage Photo DI. 

The base tag was embossed using a Darice embossing folder together with a Tim Holtz  Embossing  Diffuser to create an area at the top for stamping my Merry Christmas.  Again, I grunged up (and ripped in places) the edges of the tag and then went over the whole tag with Gathered Twigs DI and then finished the edges with Vintage Photo DI.

The pine cones and leaves are cut from the TH Tattered Pinecone die set and I added a little Rock Candy glitter and some twisted rusty wire (if you have not used this stuff yet, please do, it is amazing).  The edge of the tag, at the bottom is cut from a TH Alterations On the Edge die (Brackets). 

The tag was finished off with some burgundy silk ribbon and a rusted bell.  I hope it is Vintage enough Hels!!

My lovely blog friend Buttons, who is the Queen of Vintage, has been adding tags to her Christmas cards and I may just do that with this one rather than stick it in a drawer.

If you do visit, I hope you will leave me a comment, I love to read them and will always do my best to return the compliment (so long as I can find you).  Thank you so much for looking.   Hugs, Anne x

Sunday 18 November 2012

Sunday Stampers Week 232 - FACES

Hello Everyone

This week our lovely hostess Hels Sheridan at http://pinkleart.blogspot.co.uk has chosen FACES as our theme for this week's challenge and here is my entry.


The lovely face stamp is by Inkylicious and I stamped this onto white card.  I matted it onto an ATC which I had overstamped with a Hero Arts Harlequin background stamp and coloured with Tim Holtz Distress Inks in Peacock Feathers and Festive Berries (the same colours were used on the main tag also).  Apologies for the glare on the left hand side, it was dark when I took the photo.

At the bottom of the tag I stamped with my latest Tim set of stamps Classic Favourites No. 3 (I love this set!).  The ribbon is vintage seam binding again coloured with Festive Berries DI, scrunched, dried and added with a double bow.  The lady's eye was coloured with Peacock Feathers DI and the lips with Festive Berries and then coated with Glossy Accents.

The words are TH chit chat and say 'embrace friendship'.  It is that time of year - Thanksgiving / Harvest Festival time and I want to give thanks, amongst other things,  for all the lovely blog friends I have made since I started blogging a few short months ago.  I am truly thankful for your friendship and hope it will continue for a long time to come.  So many of you are a true inspiration to me.

I hope that you will leave me a comment, I do love to read them all and I always try to return the compliment.  Crafty hugs to you all,  Anne xx

Tim's Tag November 2012

Hello Everyone

Thought it was about time I got Tim's tag done for November, can't believe how fast this month is going.  The only reason I didn't start it sooner was because I knew that I did not have the stamps he used, so I have been wracking my brain trying to come up with alternatives.

I do enjoy doing these tags because it challenges me and I unashamedly keep to his recipe as much as possible and then go off and use the techniques on other projects, but in my own style.  It is just the way I learn best.  Anyway, here is what I created this month:


As I say, I did everything according to Tim's recipe, except the wheat stamp of Tims was replaced by a stamp from my stash (which I cannot identify) but I thought it looked a bit like wheat.  The words (celebrate with thanks) are by WaltzingMouse stamps (Say it Loud set).  We don't traditionally celebrate Thanksgiving here in the UK but we do have Harvest Festival, which some do celebrate and give thanks, hence my wording.

I did have a moment of panic when my little travel iron started smoking as I was doing the resist technique but I was brave and just carried on!  I love the end result and the way it still resists inks even when the embossing has been removed.  Definitely going to do this technique again.  The burlap was gifted to me by a lovely blog friend May, some time ago, I am using it sparingly because I don't want it to run out!

If you do visit I hope you will leave me a comment, I do love to read them all and I will do my best to return the compliment (if I can find you).  Crafty hugs, Anne xx

Thursday 15 November 2012

Brown Paper Bags and Tim Holtz Christmas Blueprint

Hi Everyone

This is a scheduled post as we are away visiting our family's latest addition, Evie, just for a day or so.  I hope the scheduling works!

I have been making brown paper bag albums for 6 or 7 years now, always at Christmas because I think it is the one time of year where family memories are important.  I have been pondering for a while now what to do with my new Tim Holtz Blueprint Christmas stamps other than just making cards or tags and this is what I came up with.  I hope you like it and will have a go at one yourself, they are such fun to make.


To start off you need some brown paper bags, American lunch bag ones are best as the ones in the UK are not such good quality but I have added some Kraft card to the front and back cover to make it a little more sturdy and that seems to work quite well and the album holds it shape better.

This is how it starts off.  My bags are approx 13.75 inches long and just under 7 inches wide so when folded in half it is nearly square.  You need to fold it so that the top opening of the bag is facing to the right hand side as you can use this opening to store things in. You will see this later on.


This is the folded bag.  You can add as many bags as you want, for my album I only used two.  At this point I punch holes (five in this case) evenly along the non opening side.  This gives you an idea of where to put your layers up to and not obscure the holes which will later hold the album together.
 
The next step is to start and decorate your album.  You can matt and layer as I have or leave the pages quite simple, it is your choice.  I have chosen the Blueprint Christmas stamps and various die cuts.
 
These are the inside pages.  I have added pockets to the left hand side as this is where I will be storing all my tags that I have made for Christmas presents for the family and where, after Christmas it is where I will store tags from presents that I receive (hopefully).


The  picture below shows one of the pockets created by the top opening of the bag,  This is useful for storing photos taken over Christmas - and I don't mean the ones we leave on our PC/Laptop/IPad/Phones - but real ones to remind us of the event.  Using two bags creates two big pockets like this, three bags will give you three pockets and so on.  In the past I have used up to five bags which makes a really thick album.


To finish off I tied two lots of ribbon and a piece of Tim's Sparkly Tinsel Twine through each hole to bind the album together.  You can use a bind-it-all machine but I could not be bothered to get mine out and I quite like the ribbon!

The cover is decorated with Tim's Bigz pinecone die, the 25 is from the Mini Reindeer Movers and Shapers die and a stamped word 'Christmas'.  The inside is decorated with various dies and each of the Blueprint stamps has been stamped onto white card, coloured with Distress Inks and then decoupaged onto Kraft card, stamped with the same design.

I hope it all makes sense.  I had the devil's own job doing this post with so many photos and trying to juggle the words!  Here is a final picture of the album standing up.  It really is quite sturdy.


Thanks for taking the time to look, assuming you have got this far!  If you do visit I hope you will leave me a comment, I love to read them all and they do inspire me to carry on.  I always do my best to return the compliment, as long as I can find you.  Crafty hugs, and will visit you when I get back.  Anne x

Wednesday 14 November 2012

WOYWW - Week 180 - Glad to be Back

Hi Everyone

I have been missing for the last couple of weeks, not for pleasure I am sorry to say, but I have missed you all and I am so glad to be back!

My desk this week looks like a complete wreck, I am doing Christmas cards again using my Tim Holtz Christmas Blueprint stamps.  I am also making something special but will blog that on Thursday, as it is not quite finished - it is really different so I hope you will come back and have a look.

So why am I showing my messy desk?  Well if you want to know more then pop over and see Julia, our Hostess with the Mostest at http://stamping-ground.blogspot.co.uk for details on how to join in on the fun.

Here is my desk - yikes!


Apart from the stamps you will see a die cut snowflake border (Memory Box), some Distress Inks, some white acrylic paint, some Tim Holtz idea-ology Tissue Wrap (Melange) - still on my desk from my last project.  Also, a Merry Christmas stamp, some Distress stain, a sanding block, some Pinflair glue gel, some pinecones that I made up last night, some rusted jingle bells, glue, corrugated card, pokey tool and some stamped images, ready for colouring.

Well, Julia likes us to keep it short and sweet so I am off now to see what some of you have on your desks today.  If you do visit, I hope you will leave a comment, I love to read them and will always do my best to return the compliment.  Happy WOYWW everyone!   Crafty hugs, Anne x

Sunday 11 November 2012

Sunday Stampers Week 231 and a New Baby

Hello Everyone

Strange title, I know, but all will become clear.  This week at Sunday Stampers our fabulous hostess, Hels Sheridan has taken inspiration from the Beatles song 'And Your bird Can Sing' and set our challenge as BIRDS.

I thought I would take a break from making Christmas Cards to make this tag for the challenge.  I cannot remember the last time I actually made my entry on the Sunday itself.....


I used Tim Holtz Distress Inks in various shades of blue, smooshed on my craft mat and swiped the tag through, drying off each time.  I then smooshed some Brushed Pewter Distress Stain onto my craft mat and dabbed this over the tag to give a slight sheen.  The edge of the tag was distressed and then covered with Black Soot DI.  The birdcage and bird are cut from TH Caged Bird Bigz die.  The cage was 'rusted' with acrylic paint and a variegated embossing powder.  The bird was covered in Tissue Wrap (Melange) and coloured with Distress Ink. 

The flower and stamped words ('the bluebird carries the sky on his back') and edging are from a Paper Artsy stamp set.  The ribbon is vintage ribbon dyed with Distress Inks in Broken China and Brushed Pewter and to finish off I added a pearl and a couple of blue beads.  At the bottom of the cage I added jump rings threaded with electric blue sequins (sorry they don't show up very well).

                                                      *************************

Now for the Baby bit - Daughter No. 1 and husband had a beautiful baby girl on Saturday, making this Grandchild No. 4 (2 for them)!!  We can't wait to go and see them all.  The baby has been named as Evie Olivia Rose.  We are just a little bit excited about the news...... 

                                                    **************************

I hope you will leave me a comment, I do love to read them all and I thank all those who do take the time to leave one, they are much appreciated.  I always do my best to return the compliment.  Have a great week everyone.  Crafty hugs, Anne xx

Tuesday 6 November 2012

Sunday Stampers Week 230 - Blue Velvet

Hello to my blog friends old and new.  Thank you so much for your kind and lovely comments recently, they have cheered me up no end! 

Sadly I am not doing WOYWW again this week as I have appointments on Thursday and Friday which will prevent me from commenting on many blogs until the weekend, so apologies for that.  I will hopefully catch up with you all next week.

This week our Hostess at Sunday Stampers, Hels Sheridan's theme is BLUE VELVET with the requirement that we use blue in our creation.  I have not done much crafting lately, other than Sunday Stampers entries and also a few Christmas cards so I thought I would combine the two.  My very talented and good blog friend Buttons is making tags to put on her Christmas cards this year so I thought I would 'borrow' the idea and put this tag on a Christmas card too.

My tag uses the Tim Holtz Blueprint Christmas stamps and I have used the snowflake as you can see here:


For some unknown reason I have had a devil of a job photographing this tag and getting the beautiful colours to show through, but I can assure you it is very blue.

I took a plain tag and backed it with some fine corrugated card to give it some substance.  I stamped the snowflakes in Versamark and embossed them with white detail embossing powder.  Broken China and Tumbled Glass distress inks were squigged onto my craft mat, spritzed with Glimmer Mist (Abominable Snowman) and a little water and the tag was smooshed through several times, drying after each smoosh. 

I then spritz and flicked water over the tag to give some random water marks. I then went around the edge of the tag with Salty Ocean DI.  Whilst the DI was still wet I covered around the edges of the tag with Frantage Shabby Blue Embossing Enamel (oh I love this stuff) and dried slowly from a great height and once it started to melt I moved closer.  This method allows some of the Frantage to stay raised.  I have tried to take a close-up to show the effect a little better.


I think you can see where some of the Frantage in the gold and white has remained raised.  It also gives a lovely texture which you can feel. 

To finish off I did go a bit mad.  I coloured some vintage seam binding with Salty Ocean, Tumbled Glass and Glimmer Mist, scrunched it up and dried it with my heat tool.  I took some of Tim Holtz's gorgeous tinsel in blue and I tied a double bow at the top.  I added some little jingle bells and pearls to finish off.  I don't usually like anything I make but I quite like this tag and after some initial misgivings I think this is one of my favourite sets of Christmas stamps ever!!

I hope you will leave me a comment, I love to read them all and will always do my best to return the compliment, if I can find you.  Have a lovely rest of the week.  Crafty hugs, Anne x

Friday 2 November 2012

Missing Temporarily and Sunday Stampers Week 229

Hello Blog Friends Old and New

My apologies blog friends and to my latest followers for going missing for such a long time.  The truth is that we had a weekend break planned which turned into a nightmare.  My lovely DH was very ill so we came home again and then I caught the dreadful Gastro-enteritis bug too.  We have been laid low for five days now and I have not been able to visit many of you other than an odd moment here and there when I could muster up the energy.  Feeling a little better today so I was able to make a tag.

The theme at Sunday Stampers this week is Autumn/Fall and the challenge is run by our wonderful hostess Hels Sheridan.  I admit I didn't feel up to making lots of leaves and I have posted a few Autumnal leaf offerings recently so I decided to use my new stamps, purchased whilst Hels was on TV a few weeks ago and use Autumnal colours instead.


The base is a No. 8 Manila tag by Ranger which I have coloured using Rusty Hinge, Scattered Straw, Wild Honey, Fired Brick and Spiced Marmalade Distress Inks.  I smooshed them onto my craft sheet, spritzed with Perfect Pearls and dragged the tag through, drying off and repeating until I got the colour I wanted. 

The stamped background was made using Tim Holtz Classic Favourites #3 set (really love this one).  I stamped onto a separate piece of card, coloured this randomly with DI's, cut some pieces out and decoupaged them.  I then stamped the tag and pieced the decoupaged strip over the top.  The words are taken from Tim's Good Thoughts set of stamps. 

I edged the word strip and the bottom of the tag with Spellbinders Fancy Lattice Expandable die, trimmed to fit.  The edges of the tag and word strip were distressed with Black Soot and the vintage ribbon has been coloured with Rusty Hinge and Festive Berries DIs.  The leaf set is Tim's Idealology coloured with Sunset Orange and Red Pepper Alcohol inks.

Last week's Sunday Stampers turned out to be a bit of a lovely surprise for me as Wendy Vecchi herself commented on my blog and also pinned my tag on Pinterest too!!    I was not well enough to do a full happy dance but it really cheered me up no end........

I will do my best to get round and visit as many of you as I can over the weekend and try and catch up on things I have missed - like your wonderful creations.  Thank you for your visit.  Crafty hugs, Anne x

Thursday 25 October 2012

Two Challenges - Time to Be You - Wendy Vecchi Inspired

Hello lovely Bloggers, Friends old and new,

The theme at Sunday Stampers which is run by the amazing Hels Sheridan is A Taste of Honey where Hels would like to see something in Honey Colours / Honeycombs.  Hels has been under the weather this week so I hope that by now she is fighting fit again.

The theme at Simon Says Stamp and Show Challenge is - Inspired by Wendy Vecchi.  There is a prize of £50 to spend at Simon Says Store for a randomly selected entry.  If you do not necessarily want to enter, please do go over and visit the blog to see what amazing pieces the DT have come up with.

Since Hels is a great Wendy Vecchi fan (me too) I can combine two challenges in one!

I have called my piece Time to Be You :


I have made my favourite hinged tag again, inspired by Hels, the base is covered in Fired Brick, Wild Honey and Rusty Hinge DIs.  I spodged the ink onto my mat, spritzed with water and then smooshed the tag through it, dried it with my heat tool and repeated until I was happy with the background colour.  I overstamped in Rusty Hinge DI with the Wendy Vecchi honeycomb stamp from the Art For You set.  The edges were distressed with Black Soot DI.
 
The bee is from Wendy Vecchi Art Part set Bugs and Butterflies and I overstamped this with the bee from the Art For you stamp set and then coloured with Distress Markers.  To make the bee glimmer I sprayed the whole thing with Glimmer Mist.  I cut the bottom of the wings off and then stamped some Clearly For Art with the bee stamp, cut it out, coloured it with alcohol ink in Cool Peri and attached it to the bee to give a clear wing effect.  The bee comes in two parts and I added the smaller body part (coloured with Distress Marker) on top of the wings to give added dimension.   I added rhinestones to highlight the eyes (I love this insect set).


The watch is another WV Art Part (Pocket Watches) and I coloured the base with Frayed Burlap, overstamped with a watch stamp from my stash and then attached the top of the watch after embossing with gold embossing powder.  I aged the watch slightly with Black Soot DI.
 
The words 'Time To' are computer generated and the 'Be You' is from the WV Art for You stamp set.  I added three jump rings to hold the two parts of the tag together.  To finish off I dyed some vintage seam binding in Fired Brick and Wild Honey DIs and added these to the tag.
 
This is a scheduled post because I am away at the moment, I had to miss WOYWW this week and I will not be able to comment on any blogs until I return early next week - sorry, I miss my daily fix of blogging already! 
 
If you do visit, I hope you will leave me a comment, I love to read them and always do my best to return the compliment.  Crafty hugs, and see you soon!  Anne x


Saturday 20 October 2012

Tim's Tag October 2012

Hello to all my blog friends old and new and a big welcome to my latest followers, it is so nice to have you along on my crafting journey.

I ask myself a question each month - why, when I have so much Tim Holtz stuff do I struggle to find the necessary products for the tag each month?  Answer - I just need to get more!

This month was no exception but I wanted to make my tag look like Tim's because I love Halloween so much and I love the colours he used, so here we go, this is my tag:


I followed Tim's recipe for the base card but with musical tissue paper and some acrylic paints from my stash.   I enhanced the backing with Distress Inks.   I then stamped the cobwebs with a Stampendous stamp and then misted the tag with Perfect Pearls Gold.

Now came the fun part - making the glitter.  I admit I did panic and thought I had got it all wrong but wow, it looks great when you just keep mixing it and get rid of the lumps - a great technique.  I cut the letter for my 'boo' from the Wordplay die (using zeros instead of 'o's' because they were bigger) and glued the letters together with Glossy Accents.  I cut the flourish from the Elegant Flourishes die and trimmed a bit off.  I then put Glossy accents over both pieces and covered them with the glitter.  The spider was stamped (Stampendous), and Glossy Accented and glittered.

I don't have the ticket die but used a Journalling Ticket, cut down, added an October calendar, heavily distressed with Frayed Burlap and Vintage Photo DI's and added a computer generated word - spooky.  I attached it with a little clothes peg that I coloured in orange acrylic paint.

To finish off I added Tim's Tinsel ribbon (have I said how much I love this stuff before - oh yes, sorry, I have) and some vintage seam binding dyed with Rusty Hinge DI.  I think I have enjoyed making this tag so much because they are techniques that I have never tried before and because I had to think about how to replace some products - always a challenge for me!

I hope you like my tag and I also hope you will leave me a comment, I love reading them and they encourage me to continue along this crafty road.  I will always try to return the compliment wherever possible.  Crafty hugs, Anne x

Thursday 18 October 2012

Sunday Stampers Week 227 - Metal (Very Heavy)

Hello Blog Friends

A big welcome to my latest followers, it is lovely to have you along on my crafty journey.  I hope you will find some things of interest along the way.

This week over at the wonderful Hels Sheridan's blog the theme of  Sunday Stampers is Metal, based on one of her favourite rock bands, Judas Priest.  I hope she will forgive me because I have never heard of them but if Hels liked them they must have been good..... she was a rock chick after all.

Hels has requested that we use a small amount of metal (or a whole shed load of the stuff) and some stamping.  Those of you who follow me regularly will, by now, know that I quite like Hallowe'en and I have been using my Tim Holtz skull stamp quite a lot (see my last three posts!).  You may be pleased to know that I have not used the skull on my tag but it is VERY heavy in metal!!  Here it is:


Metal does not like to be photographed but I have done my best.  It reads I Love (Heart) Halloween.  The spider is a special treat for Hels who loves them.

I covered a tag with metal tape (a gift from my friend Mo) and embossed it with Tim's metal embossing folder and then smeared a few drops of Pitch Black Alcohol Ink in a few places.  I then covered the whole of the tag with Black Soot DI and then buffed it up.  I stamped a spider's web (Stampendous) at the top and the bottom of the tag.  I cut the bottom off the tag to make a hinged tag (a trick I learned from Hels and now love) and attached the hinge with four jump rings. 

The heart and arrow are Ranger grungeboard shapes which were already cut and embossed.  On the heart this is covered with Indigo Blu Flitter Glue and then covered with Mega Flakes in Lancashire Rose.   The arrow was covered in black embossing powder and heat set.  The letter 'i ' has been treated in the same way.  The spider (Stampendous)  has been stamped, embossed and carefully cut out.  The word Halloween is from Tim's Apothecary set of stamps and has been stamped onto white card, embossed in black, cut out and then over inked with Black Soot DI.

The ribbon at the top is vintage seam binding, coloured in Rusty Hinge DI and has been tied with a piece of Tim's tinsel ribbon.

If you do visit I hope you will be kind enough to leave me a comment, I love to read them and I always do my best to return the compliment (if I can find you).  Crafty hugs, Anne xx

Wednesday 17 October 2012

WOYWW - Week 176 - Christmas and Hallowe'en

Hello Fellow WOYWWers and Blog Friends

A big welcome first to my latest followers, I am thrilled that you want to come along on my crafting journey, as I develop and learn new ways of creating - thank you!  Thank you too, to all of you who have left me the most amazing comments on my Hallowe'en pieces recently, it means a huge amount to me.

It is that time of week again when we share our desks with the world of WOYWWers, through our wonderful Hostess, Julia who you can find HERE.  If you want to join in then please pop over to see Julia who will explain all - but be warned, it is very addictive but it is also a place to make wonderful new friends too.

On my desk this week, more Christmas and Halloween as you can see here:


The Christmas card is awaiting a sentiment although I can't decide whether to put one on or leave it as it is.  The die cut deer and the 25 are from Tim Holtz Movers and Shaker dies, I added antlers by using the Movers and Shakers branch die cut, cut down to size.  The white backing is the shattered glass embossing folder and once embossed, I added some glitter.   The dress form has been painted for the third time, awaiting inspiration.  To the right is Robbie, my amazingly beautiful handmade bear from my wonderful blog friend Rita.  Robbie watches me craft and then goes back to my display shelf each night........I know, but I love him and like to see him! 

In front is another Hallowe'en skull, stamped and decoupaged, with scary eyes, backed onto black glitter card, waiting to be mounted onto a card base. I am loving that Tim Holtz stamp set so much, I am using it nearly every day!   The skeleton on the black card at the front is from a Memory Box die and you can construct the skeleton any way you like as each part is separate.  When standing straight he is about 5 inches tall (approx 13 cm).  I quite like him in a dancing position.

Well that's it from me, hope you enjoyed your peek into my craft world and I look forward to visiting you too.  Happy WOYWW, Crafty hugs, Anne x

Monday 15 October 2012

Hallowe'en continues.......

Hello Blog Friends

Thank you to all my blog friends old and new for your amazing comments on my Hallowe'en graveyard piece, I am thrilled to bits that you like it!  I had so much fun doing it.

I love Hallowe'en, although here in the UK we do not really celebrate it, but with my Canadian roots, I still enjoy all things Hallowe'en and love when the neighbourhood children come round to the house all dressed up in their lovely little scary costumes.......

So, I have got a fairly new set of Tim Holtz stamps called Apothecary and in the set is an amazing skull, which I think would be good for times other than Hallowe'en too.  I have been having fun playing with it and made several items, one of them is a tag which you can see here:


If you click on the picture you will get a closer look.

I have used my new favourite style of tag with a hinge.  I got the inspiration from the fabulous Hels Sheridan who loves working with hinged tags.

The base is a No. 10 sized Ranger tag (with approx 2.1/2" cut off for the hinged piece).  I stamped all over the background with the script stamp that comes in the set and I coloured in the centre of each part with Old Paper Distress Ink and then the rest of the tag was coloured with Rusty Hinge DI.  I did Tim's spritz and flick technique to create some interest.  The edges have been coloured with Black Soot DI.  The skull has been stamped onto the tag and then I stamped and cut out another skull, cut out the eyes, nose and mouth and then decoupaged this on top of the stamped skull to make it look more realistic.  The skull was lightly coloured with Old Paper DI.

I added a few Memory Box die cut bats and two orange gems for the scary eyes (I think they look quite spooky).  The Happy Hallowe'en comes in one line on the stamp so I masked off and stamped each word separately and then used Tim's new technique (which you can find on his October tag details) to make the black glitter (very messy but fun).  I punched four holes in the tag and the hinge and used bronze coloured rings to attach the two together.

I finished off by dying some vintage seam binding with Rusty Hinge DI and put this through the top hole along with Tim's new black tinsel (which I purchased from the Funky Junkie Boutique)  If you have not tried this tinsel, it is brilliant, it is lovely and soft and not at all like the tinsel you get for the Christmas tree.  It has a slight stretch to it making it ideal to put on your tags.

There is a challenge over at Anything But A Card (ABAC) Challenge which is Fall or Halloween and I would like to enter my tag into this challenge.  The Design Team have come up with some stunning projects, it is worth a peek if you have the time.

I am also entering this into Frilly and Funky Challenge sponsored by the Funkie Junkie Boutique where you get a coupon for 25% off products in the Boutique, great value anyway but with 25% off it makes it amazing value.

Thank you for looking, I hope you will leave me a comment, I love to read them and will try, wherever possible (if I can find you!) to return the compliment.  Have a lovely week.  Crafty hugs, Anne x


Wednesday 10 October 2012

A Couple of Challenges - It is a bit macabre!

Hello Fellow Bloggers

Thank you so much to my latest followers (I really appreciate you being along with me on my crafting adventures) and my trusty other followers.  I am not sure what you are going to make of this creation but I can tell you I had the most fun making it!

The Frilly and Funky Challenge is to create a tag - but a Different Kind of Tag and one with a theme.  The challenge is sponsored by the Funkie Junkie Boutique and the prize is $25 gift voucher to spend in the Funkie Junkie Boutique.

The Simon Says Stamp and Show Challenge is named Rustification where they want to see some rusted materials on the entry.  The prize for this challenge is a $50 gift voucher from Simon Says Stamp Shop.

I am also entering into Haunted House Designs Challenge 154, Bats in the Belfry where bats are a requirement.  I have two bats attached to the Boo sign, I just hope it is scary enough for their challenge - if you like Bats/Halloween, it is certainly worth a peek.

I have also seen a great challenge at Inspiration Emporium blog where the challenge is to create a 'Spooktacular Decoration' and the prize is $50 in Emporium Dollars to spend in the store.  My little piece is intended for a decoration on Halloween night so I thought I would enter this one too!

OK, anyone of a nervous disposition please turn away (only kidding!) now because here is my entry:


I created my tag by using a piece of galvanised mesh panelling which I formed into a tag shape by using a No 8 Manila tag.  The mesh was then bent at right angles so that it would stand up on its side, with two/thirds of the wire tag left to form a back.  I added a small 'shelf'', approx 2" wide from card,  for the coffin to stand on and I coloured the mesh with pitch black alcohol ink to give a more tarnished and weathered look.  The coffin was made from plain card and covered with wood effect paper and then distressed to within an inch of its life with Tim Holtz Distress Ink in Bundled Sage and Black Soot.  A piece of dyed crinoline fabric has been placed inside the coffin.

The broken picket fence and tree are die cuts and the bats were a gift in my recent purchase from the Funkie Junkie Boutique.  The gravestones were drawn and cut out by me.  The two fabulous skeletons are a recent purchase from a well known auction site and I covered these brass coloured skeletons with Tim Holtz Mixative in Snow Cap and gave each of them a set of amber eyes to make them even spookier.

The rusting was great fun.  The word Boo has been taken from Tim Holtz Kraft Idea-ology Chipboard Letters and I used rusting powder to rust them up and then distressed by adding a little acrylic paint.  I finished off the tag by adding some of Tim Holtz's new tinsel ribbon and a piece of vintage ribbon, again purchased from The Funkie Junkie.

I put orange glitter card behind so that it would show up the mesh better when photographed.  Here is a picture from above to show the inside a little better.  Love the way the skeleton in the grave yard looks so relaxed.......


I know it is a bit macabre and a very unusual make for me, but a family members loves this kind of thing so after I put it in the window on Halloween with a battery operated tea light, it will go to them.......

I hope you like it!  If you do visit I hope you will leave me a comment, I always do my best to return the compliment.  Crafty hugs, Anne x

WOYWW Week 175 - What a mess!

Hello Fellow WOYWWers and Bloggers

I would like to say a huge thank you to all of you who take the time to leave me lovely comments, I do so appreciate them, it doesn't take much to keep this old girl happy but you certainly give me a big boost!

It is that time again when we take a peek at desks around the globe and see what each other is getting up to.  If you want to join in then pop over and visit Julia at http://stamping-ground.blogspot.co.uk for all the information you need.  It is great fun, there are some wonderful Bloggers out there, but it is addictive!

Short and sweet this week, as per Julia's gentle instructions - here is my desk (I took it late afternoon when we had sunshine - yay!) because I was not going to touch it again overnight:


You will see some Hallowe'en paper with die cut bats ready for making up, a birthday card for a relative, some mini Noel (TH die) Christmas cards that a friend asked for, some of my trusty Distress Inks, some Fran-tage and then the other usual glues, spray and implements that I have been using.  Not too exciting but I left it quite messy.  The weather was so lovely today that DH took me out for lunch and it was lovely, so no crafting for me today.

Looking forward to seeing your work spaces.  If you do visit me I hope you will leave me a comment, I always do my best to return the compliment.  Happy WOYWW everyone, crafty hugs from Anne x.

Monday 8 October 2012

Sunday Stampers Week 226 - Snowflakes

Hello Lovely Blog Friends old and new,

This week over at Sunday Stampers which is hosted by the amazing Hels Sheridan the theme for the challenge is Snow/Snowflakes.

Those of you who have been having a look at my blog recently,  will know that I have been making my Christmas cards.  I was reading Craft Stamper Magazine last week and came across a fabulous design (page 12 & 13) by a designer called Joanne Allison where she uses the Tim Holtz Texture Fade: Cracked to make a card.  I have 'borrowed' her design to make my tag for the challenge.  And then today another of my crafting heroines, the wonderful Kath Stewart has used the Texture Fade too.  I don't know about all of you but I do get a bit bored making the same card over and over so this year I am sticking to just a few designs, although I have yet to use my fabulous Tim Holtz Christmas Blueprint stamps.  So I thought I would make a tag for this challenge:


I decided to make one of Hels' popular hinged tags.  I embossed white card, cut it to tag size and matted it onto a larger tag which I coloured with Broken China Distress Ink.  The cracking has been covered with embossing ink using a brayer and then I used Fran-tage Shabby Blue Embossing Enamel to highlight the cracks.  I stamped two snowflakes at the top of the tag and also covered them in Shabby Blue.

The layered snowflake is made up from two Spellbinder snowflake dies (2010 Snowflake Pendant and Create A Flake 3) and a rosette of my own, all cut from white glitter card.  I added a gorgeous roundelle covered in diamante with a toning blue stone in the middle (my photography doesn't really show it in all its beauty - sorry).  The Merry Christmas is stamped with a freebie stamp from Simply Cards & Papercraft.

The pearl and crystals are Tim Holtz and the snowflake is from my stash.  The ribbon is vintage seambinding coloured with Broken China Distress Ink smooshed on my craft sheet and then liberally wet with Tattered Angels Abominable Snowman Glimmer Mist (I think I have said before, but this stuff is fabulous - so shiny! and it is a limited edition so I bought two).

If you do visit I hope you will leave me a comment, I do love to read them and I will always do my best to return the compliment (if at all possible).  Crafty hugs, Anne x

Saturday 6 October 2012

Anything But a Card Challenge - Shiny, Sparkly, Blingy!

Hello Blog Friends

Welcome to my latest Followers, it is a pleasure to have you along on my crafting adventure, I very much appreciate you and all my loyal Followers taking the time and effort to watch my journey!

This time over at Anything But a Card Challenge the theme is Shiny, Sparkly, Blingy.  I wanted so much to enter this time but was a little worried about the requirements, I tend to only use shiny, sparkly, blingy for Christmas but as I have been making Christmas cards and have all my glitters out, I thought I should have a go.  One of the DT has done some fabulous Christmas baubles so I thought it would be OK.

The wonderfully talented Christine Emberson makes gift bags out of envelopes.  I have been making these to give little treats to family and friends.  If you click on Christine's name you will be transported to a little video that Christine has made, showing how she did it - prepare to be inspired!

Since I saw Tim Holtz's rosette snowflake die I have wanted it so much (needed it!) but I could not afford this and there are many other things (mainly Tims) before it on my 'must have' list so I thought I would attempt to make something similar (although nowhere near as nice as TH's) and it is here on my little gift bag:


The backing paper is coloured with Pan Pastels (love these) and then overstamped with a snowflake stamp, covered with embossing powder and heated.  The vintage seam binding is also coloured with the same Pan Pastel.  The tag is Craftwork Cards, punched and hung with a jump ring.  The icicle strip across the top is glitter card, cut, folded and held on with a white paper clip with a bit more ribbon tied on the end.  Such a simple but effective closing.

The rosette was quite simple once I got the hang of it.  I scored a 12" x 2" strip of thin white card with my Martha Stewart score board at 1/4" intervals.  I then took the strip and drew a line along the whole length at about 1.1/4".  I then cut along the drawn line and at every 4th and 5th score line I made a point.  I then cut along the whole length to include the points.  I then concertina folded the whole length and glued the ends together, ensuring that the spacing at the end matched the rest of the point folds.  Once dried I pushed the rosetted into a circle and glued a piece of card to the back to hold the whole rosette in place.  Once the glue was dry I then sprayed the whole rosette with Crafters Companion Stick and Spray and liberally covered it with glitter.  It does take a lot of time and effort so I may think again about the die, but I am happy with the result.

The smaller snowflake is cut from glitter card using a Spellbinders snowflake die and I added a clear gem to the middle. The rosette is nowhere near as glamorous as Tims, his are quite stunning but for a gift bag I think my way is fine.

If you do visit, I hope you have enjoyed it and that you will leave me a comment.  I do love to read them and I will always do my best to return the compliment, as long as I know how to get in touch.  Crafty hugs, Anne x
Related Posts Plugin for WordPress, Blogger...

Labels